Tuesday, April 22, 2008

Envelope Liners

A lot of people have asked for instructions on lining envelopes. I found some online instructions from Martha Stewart and started my project.

Here are my supplies - paper cutter, pencil, envelopes and a tape runner. I suggest using lightweight paper. You don't want to add weight to your envelope and you want to be able to fold it easily as well as fit the card back in there.

The first thing I did was trace the envelope. If you look close you can see the outline. I should have done this on the white side so you could see it easier!


Then you want to reduce the width by 1/4". This allows it to slide into the envelope easily.

The tricky part is how tall to have the liner. What I did was measure the glue on the envelope and measured down that far. Mine was just over 1/2".

The cutting can also be tricky. I just used my paper cutter for all edges. But you want to mark on the template you're making where the fold will be. This will allow you to figure out the angle of the triangle.

Once you get the angle, you'll end up with your template. This might take a couple of tries to get it right. Don't get discouraged! I marked the tip of the triangle and the two sides and used the paper cutter to line them up. Try putting it in the envelope and make sure it looks right.

I then used that template to trace all the other ones I needed. I had 8.5x11 paper and I was able to get two to the page, hopefully you can see the tracings.


Next you'll slide the cut out into the envelope. I like to make sure the corner of the liner lines up with the fold of the card.

Fold down the flap and make a crease. Then lift up the envelope flap, leaving the liner laying down.


I used a tape runner to add adhesive to the liner. Then simply fold over the envelope and rub it a few times to make sure it will lay flat.

The instructions might sound a little confusing, but I assure you, it's quite easy. Let me know if you have any questions!

Friday, April 18, 2008

Shower thank you notes

My first family shower is tomorrow so I wanted to get working on some thank you notes!

My first attempt was a failure. I had intended to use my gocco for everything, but for some reason it wasn't liking the text I had the "thank you" written in.
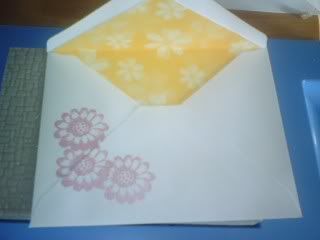
So that night I was in a crafty mood, but I was very frustrated. So I decided to line the envelopes for the cards. This was not a project I had intended to do, but I'm very glad I did. I love how it looks!
My next attempt at the cards went much better. I decided to just gocco the flower pattern and use a stamp for the "thank you" part. It looked so good that I decided to carry the design onto the envelopes as well. I'm glad I did!
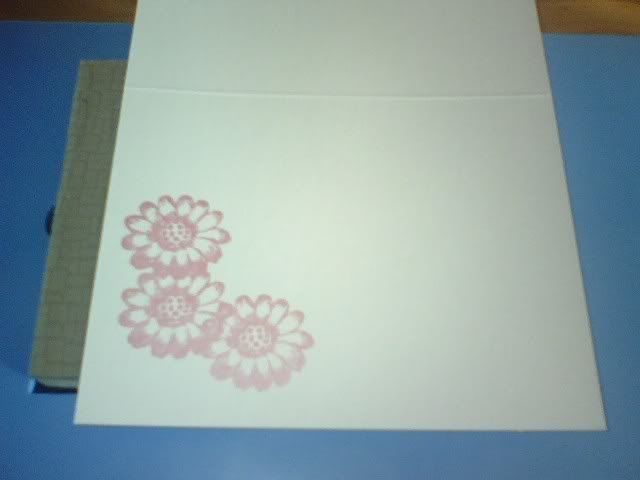


I get nervous stamping directly on a finished card because my stamping skills aren't that great. So I decided to cut out ovals using my trusty Cricut and stamp on them. (With some eat, drink & be married coasters in the background!)

I used blue and purple paper, since I didn't have enough of either color. No big deal, nobody will know or care!
And here is the finished product. I really love how they came out and I hope people notice that I took the time not only to hand write them, but to hand make them as well.

Thursday, April 3, 2008

Envelope Liners!

One night when I was frustrated with my Gocco (that's a post for another day) I decided to line my envelopes for the thank you cards for the upcoming showers.


I had a good idea on how to do this, but Martha Stewart gave me some tips I didn't think of. Check her site out for some great directions.


  • First I drew my template.

  • Then I cut them all out with my paper trimmer.

  • Next, put a liner in each envelope. Fold over the flap and crease the liner.

  • Then, lift up the envelope flap leaving the liner folded over.

  • Put glue on the backside of the liner.

  • Fold over the envelope flap to seal.

Here is my finished product.


I am actually going to be doing a few more very soon (maybe tonight) so I will remember to take pictures along the way to update this post with.

Some table runner questions answered!

I realize now that in my head it all makes sense, but I wasn't really clear on a lot of things.

First - What type of paint did you use? I used regular acrylic paint. I didn't even think of fabric paint, and it worked great.

Second - How are you going to display it? I am going to have it hanging down off the side of the cake table, facing the guests. The cake will sit on top of the table and the runner will run across, hanging down on both sides.

Third - How did I get the print so large and to print on multiple sheets? I opened the picture up in Microsoft Publisher and changed the print dimensions to 30"x30". It then printed out on multiple sheets and I was able to tape them together.

In Publisher - go under File, Page Setup. Under Layout, choose Custom and type in your dimensions.

Fourth - How did I determine how big I needed the monogram to be? This was total guess work. I actually now wish that I had made it a little smaller. Maybe 25" or something, but it wasn't worth doing over again.

But, to really determine, you can measure how wide you want your runner to be and use the dimensions that will fit inside that width.

Hope this helps explain some things - let me know if there are any more questions!

Wednesday, April 2, 2008

Gocco Coasters

After seeing a post on http://www.weddingbee.com/ about gocco'd coasters, I knew I had to give this a try.

Once again, I had knottie Kendra Rose design the words "Eat, Drink & be Married" as a 4"x4" design that can be used both for a round and square coaster.

Here is the design that will work best with the gocco:

Here is the finished product on a coaster:

I have a gocco tutorial coming in a later post! Until then, if you have any questions, leave a comment!


Monogram table runner

Last night I created a monogrammed table runner for our cake table. It was so easy and I think it's a really nice personal touch! Here's how I did it:

1. I bought white fabric that is kind of a linen at the craft store.
2. I printed out the monogram to size 30"x30".
3. I taped them all together and taped them to our kitchen table.


4. I put the fabric evenly over the monogram and started painting!


The colors are much more distinct in person. Huge credit goes to knottie Kendra Rose for the beautiful monogram.

I still have to figure out how long the runner needs to be (it's on 4 yards of fabric right now). Then I will cut it and finish it to length for the table.

If you have any questions, feel free to leave a comment!

First Post

Hi Everyone! I figured it was easier to blog about my DIY projects instead of creating a separate page for them. I love a good blog!